Simple Lighting
Right now the 3D object looks very boring and it is also a bit difficult to see the different faces of the cube because there is no visual difference between fragments that are in the front and others that are a bit further from the camera.
We will add light to the scene and affect the color of each fragment depending on how they are facing the camera and the light.
First, we need to process the fragment’s color to add lighting before it is rendered:
ColorRGBA fragColor = Renderer_CalculateFragmentLighting(r, frag);
frag.color = fragColor;

// Render Fragment
We have created a function called Renderer_CalculateFragmentLighting that allows us to calculate a new color for each fragment.
ColorRGBA Renderer_CalculateFragmentLighting(Renderer *r, Fragment frag) {
   // TODO: Add lighting
   Vec3 lighting = {1.0f, 1.0f, 1.0f};

    return {
        frag.color.r * lighting.x,
        frag.color.g * lighting.y,
        frag.color.b * lighting.z,
        frag.color.a,
    };
}
For now the function only returns the same color of the fragment.
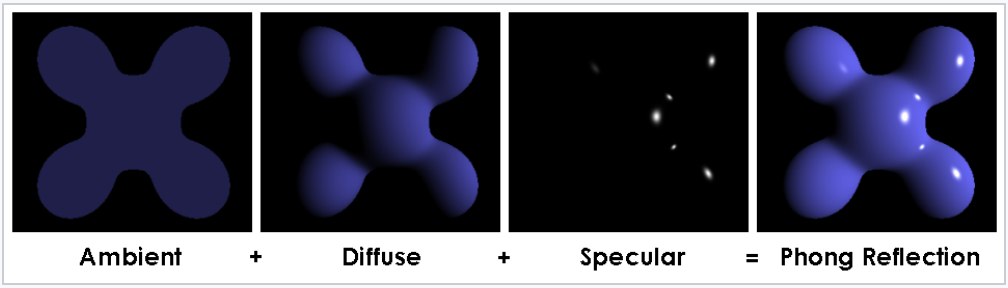
The lighting model that we want to implement is called Phong lighting model and the idea is to combine 3 steps of light. The ambient, the diffuse and the specular reflection. This can be visualized in the following image:
Ambient Light
The first type of light that we want to add is Ambient Lighting. This type of light comes from every direction and illuminates the scene equally.
ColorRGBA Renderer_CalculateFragmentLighting(Renderer *r, Fragment frag) {
    // Ambient
    float ambientStrength = 0.1f;
    Vec3 lightColor = {1.0f, 1.0f, 1.0f};
    Vec3 ambient = Vec3_ScalarMult(lightColor, ambientStrength);

    Vec3 lighting = ambient;

    return {
        frag.color.r * lighting.x,
        frag.color.g * lighting.y,
        frag.color.b * lighting.z,
        frag.color.a,
    };
}
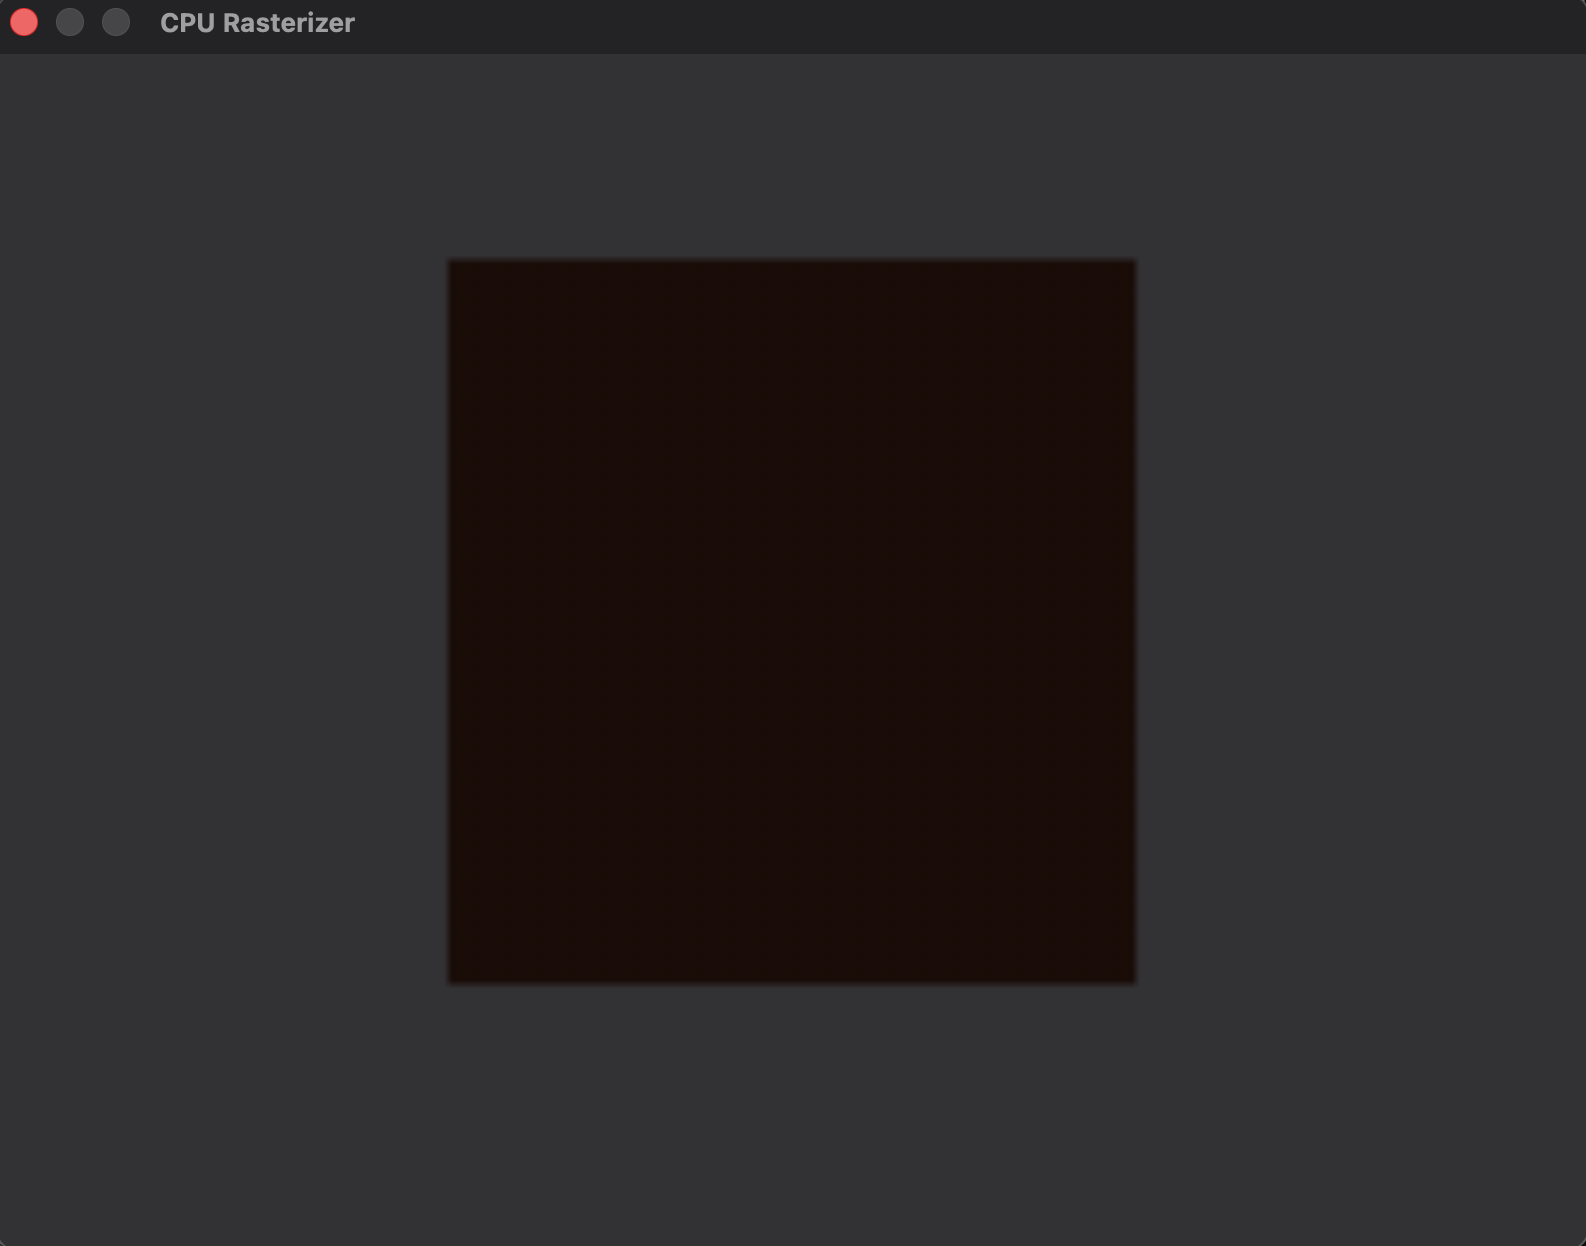
Right now the scene looks quite dark. This is because we set a low value for the ambientStrength.
Diffuse Light
The next type of light that we want to add is diffuse lighting. This type of lighting has a direction and will illuminate the fragments that are facing the light by some factor.
Before we can add this type of light, we need to add more information to the fragments. We will add the normal vectors. These vectors are unit length vectors that determine which is the front of a fragment. We like to think of them as the face of the fragment.
First we will add the normals to each of the vertices:
CubeMesh CreateCubeMesh() {
    CubeMesh mesh = {
        .vertices{
            // Geometry + Normals
            -0.5f, -0.5f, -0.5f, 0.0f,  0.0f,  -1.0f,
            0.5f,  -0.5f, -0.5f, 0.0f,  0.0f,  -1.0f,
            0.5f,  0.5f,  -0.5f, 0.0f,  0.0f,  -1.0f,
            0.5f,  0.5f,  -0.5f, 0.0f,  0.0f,  -1.0f,
            -0.5f, 0.5f,  -0.5f, 0.0f,  0.0f,  -1.0f,
            -0.5f, -0.5f, -0.5f, 0.0f,  0.0f,  -1.0f,

            -0.5f, -0.5f, 0.5f,  0.0f,  0.0f,  1.0f,
            0.5f,  -0.5f, 0.5f, 0.0f,  0.0f,  1.0f,
            0.5f,  0.5f,  0.5f,  0.0f,  0.0f,  1.0f,
            0.5f,  0.5f,  0.5f,  0.0f,  0.0f,  1.0f,
            -0.5f, 0.5f,  0.5f, 0.0f,  0.0f,  1.0f,
            -0.5f, -0.5f, 0.5f,  0.0f,  0.0f,  1.0f,

            -0.5f, 0.5f,  0.5f,  -1.0f, 0.0f,  0.0f,
            -0.5f, 0.5f,  -0.5f, -1.0f, 0.0f,  0.0f,
            -0.5f, -0.5f, -0.5f, -1.0f, 0.0f,  0.0f,
            -0.5f, -0.5f, -0.5f, -1.0f, 0.0f,  0.0f,
            -0.5f, -0.5f, 0.5f, -1.0f, 0.0f,  0.0f,
            -0.5f, 0.5f,  0.5f,  -1.0f, 0.0f,  0.0f,

            0.5f,  0.5f,  0.5f,  1.0f,  0.0f,  0.0f,
            0.5f,  0.5f,  -0.5f, 1.0f,  0.0f,  0.0f,
            0.5f,  -0.5f, -0.5f, 1.0f,  0.0f,  0.0f,
            0.5f,  -0.5f, -0.5f, 1.0f,  0.0f,  0.0f,
            0.5f,  -0.5f, 0.5f, 1.0f,  0.0f,  0.0f,
            0.5f,  0.5f,  0.5f,  1.0f,  0.0f,  0.0f,

            -0.5f, -0.5f, -0.5f, 0.0f,  -1.0f, 0.0f,
            0.5f,  -0.5f, -0.5f, 0.0f,  -1.0f, 0.0f,
            0.5f,  -0.5f, 0.5f,  0.0f,  -1.0f, 0.0f,
            0.5f,  -0.5f, 0.5f,  0.0f,  -1.0f, 0.0f,
            -0.5f, -0.5f, 0.5f, 0.0f,  -1.0f, 0.0f,
            -0.5f, -0.5f, -0.5f, 0.0f,  -1.0f, 0.0f,

            -0.5f, 0.5f,  -0.5f, 0.0f,  1.0f,  0.0f,
            0.5f,  0.5f,  -0.5f, 0.0f,  1.0f,  0.0f,
            0.5f,  0.5f,  0.5f,  0.0f,  1.0f,  0.0f,
            0.5f,  0.5f,  0.5f,  0.0f,  1.0f,  0.0f,
            -0.5f, 0.5f,  0.5f, 0.0f,  1.0f,  0.0f,
            -0.5f, 0.5f,  -0.5f, 0.0f,  1.0f,  0.0f,
        },
        .numVertices = 36,
        .vertexSize = 6,
    };

    return mesh;
}

QuadMesh CreateQuadMesh() {
    QuadMesh mesh = {
        .vertices{
            // Geometry + Normals
            -0.5f, -0.5f, 0.0f, 0.0f,  1.0f,  0.0f,
            0.5f,  -0.5f, 0.0f, 0.0f,  1.0f,  0.0f,
            0.5f,  0.5f,  0.0f, 0.0f,  1.0f,  0.0f,
            0.5f,  0.5f,  0.0f, 0.0f,  1.0f,  0.0f,
            -0.5f, 0.5f,  0.0f, 0.0f,  1.0f,  0.0f,
            -0.5f, -0.5f, 0.0f, 0.0f,  1.0f,  0.0f,
        },
        .numVertices = 6,
        .vertexSize = 6,
    };

    return mesh;
}
Notice that now each vector is composed of 6 components, 3 for the geometry location, 3 for the normal vector.
The next step is to include the normal in each of the vertices of the triangle:
for (int i = 0; i < length * size; i += (size * 3)) {
    int v1i = i;
    int v2i = i + size;
    int v3i = i + (size * 2);

    ...

    Vec4 v1N = {vertices[v1i + 3], vertices[v1i + 4], vertices[v1i + 5],
                1.0f};
    Vec4 v2N = {vertices[v2i + 3], vertices[v2i + 4], vertices[v2i + 5],
                1.0f};
    Vec4 v3N = {vertices[v3i + 3], vertices[v3i + 4], vertices[v3i + 5],
                1.0f};

    ...

    Triangle triangle = {
        .v1 = Vertex{Vec3{v1.x, v1.y, v1.z}, v1N, v1Color},
        .v2 = Vertex{Vec3{v2.x, v2.y, v2.z}, v2N, v2Color},
        .v3 = Vertex{Vec3{v3.x, v3.y, v3.z}, v3N, v3Color},
        ...
    };

    triangles.push_back(triangle);
}
Now, when interpolating the fragments, we need to also interpolate the normal of the new fragment. This can be done similar to how it is done with the color:
Fragment TriangleInterpolatePoint(Triangle triangle, float b0, float b1,
                                  float b2) {
    Fragment frag;

    // Perspective-correct interpolation
    float invZ0 = 1.0f / triangle.v1.coords.z;
    float invZ1 = 1.0f / triangle.v2.coords.z;
    float invZ2 = 1.0f / triangle.v3.coords.z;

    ...

    // Frag Normals
    frag.normal.x =
        (b0 * triangle.v1.normal.x * invZ0 + b1 * triangle.v2.normal.x * invZ1 +
         b2 * triangle.v3.normal.x * invZ2) * z;
    frag.normal.y =
        (b0 * triangle.v1.normal.y * invZ0 + b1 * triangle.v2.normal.y * invZ1 +
         b2 * triangle.v3.normal.y * invZ2) * z;
    frag.normal.z =
        (b0 * triangle.v1.normal.z * invZ0 + b1 * triangle.v2.normal.z * invZ1 +
         b2 * triangle.v3.normal.z * invZ2) * z;

    frag.normal = Vec3_Normalize(frag.normal);

    return frag;
}
Finally, we can calculate the diffuse lighting. We will assume that the source of light is positioned at {80.0f, 50.0f, 50.0f}:
ColorRGBA Renderer_CalculateFragmentLighting(Renderer *r, Fragment frag) {
    // Ambient
    float ambientStrength = 0.1f;
    Vec3 lightColor = {1.0f, 1.0f, 1.0f};
    Vec3 ambient = Vec3_ScalarMult(lightColor, ambientStrength);

    Vec3 fragPos = {(float)frag.coords.x, (float)frag.coords.y, frag.z};

    // Diffuse
    Vec3 lightPos = {80.0f, 50.0f, 50.0f};
    Vec3 norm = Vec3_Normalize(frag.normal);
    Vec3 lightDir = Vec3_Normalize(Vec3_Subtract(lightPos, fragPos));
    float dp = Vec3_Dot(norm, lightDir);
    float diff = dp > 0.0 ? dp : 0.0;
    Vec3 diffuse = Vec3_ScalarMult(lightColor, diff);

    Vec3 lighting = Vec3_Add(ambient, diffuse);

    return {
        frag.color.r * lighting.x,
        frag.color.g * lighting.y,
        frag.color.b * lighting.z,
        frag.color.a,
    };
}
Here, each fragment will get a different color based on their position and how they face the light.
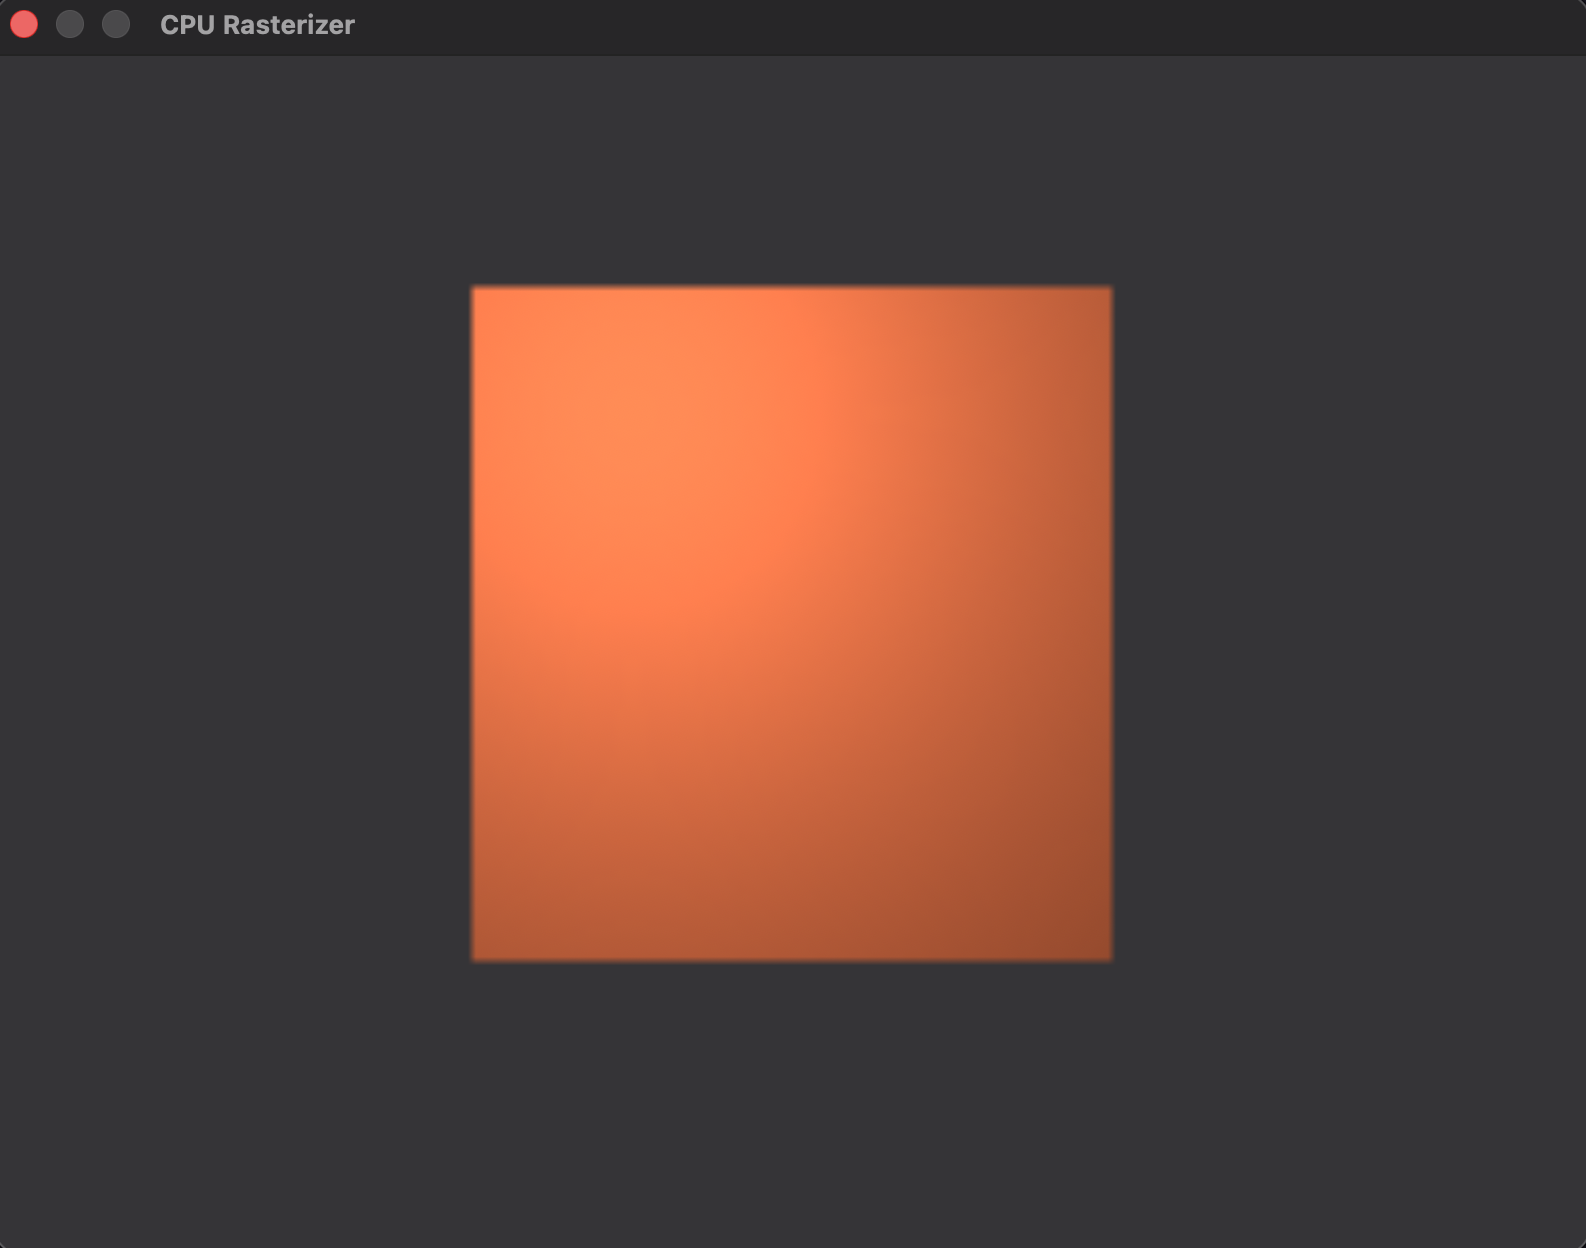
This already starts to look a bit more realistic. But there is a small improvement that we can add to give a nice reflection of the light source to the camera on the face of the cube. This is done with Specular lighting.
Specular Light
This type of light is used to add highlights to the object based on where the light is coming from. It is based on a model called Phong Reflection.
ColorRGBA Renderer_CalculateFragmentLighting(Renderer *r, Fragment frag) {
    // Ambient
    float ambientStrength = 0.1f;
    Vec3 lightColor = {1.0f, 1.0f, 1.0f};
    Vec3 ambient = Vec3_ScalarMult(lightColor, ambientStrength);

    Vec3 fragPos = {(float)frag.coords.x, (float)frag.coords.y, frag.z};

    // Diffuse
    Vec3 lightPos = {80.0f, 50.0f, 50.0f};
    Vec3 norm = Vec3_Normalize(frag.normal);
    Vec3 lightDir = Vec3_Normalize(Vec3_Subtract(lightPos, fragPos));
    float dp = Vec3_Dot(norm, lightDir);
    float diff = dp > 0.0 ? dp : 0.0;
    Vec3 diffuse = Vec3_ScalarMult(lightColor, diff);

    // Specular
    float specularStrength = 0.5f;
    Vec3 viewDir = Vec3_Normalize(Vec3_Subtract(r->camera.position, fragPos));
    Vec3 reflectDir = Vec3_Reflect(Vec3_ScalarMult(lightDir, -1), norm);
    float spec = powf(fmaxf(Vec3_Dot(viewDir, reflectDir), 0.0), 32);
    Vec3 specular = Vec3_ScalarMult(lightColor, specularStrength * spec);

    Vec3 lighting = Vec3_Add(ambient, diffuse);
    lighting = Vec3_Add(lighting, specular);

    return {
        frag.color.r * lighting.x,
        frag.color.g * lighting.y,
        frag.color.b * lighting.z,
        frag.color.a,
    };
}
The image shows a ring of light close to the top left of the quad. This is the effect of the specular reflection.
